Are you a business owner? Want to create or start a blog easily? Whether it is a small business or large scale business, It is important to take it online to increase your business output and sales. So, if you are new in this and don’t know how to do it then believe me, this blog would help you a lot.
Table of Contents
Step to Start or Create A Blog Using Hostgator
Follow these complete steps to make your website.
Step 1 Choose Your Blog Name
Firstly, you need to choose a blog name or your business name to create your website. This will represent your business and people will reach to you through this name.
Step 2 Buy Website Domain
1) First you need to check that the blog name you think, is available or someone already took it.
2) Check to see currently available domains are available using HostGator’s Domain Registration tool.
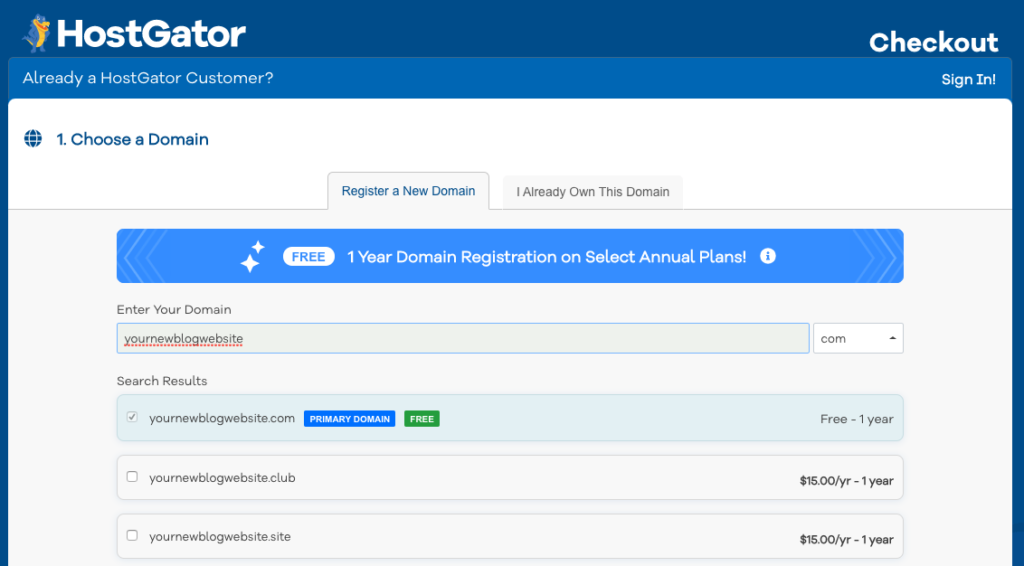
Now click to register your new domain. Also there are some variants like select different plan for different years.
Step 3 Buy Website Hosting
Next important thing to start a blog is to buy hosting for your website.
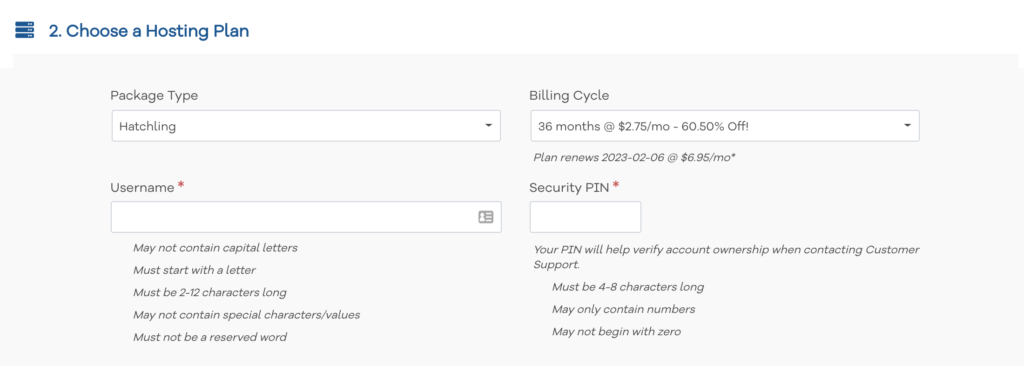
1) First, Select your hosting plan at HostGator

2) After selecting your hosting plan, enter a user name and password that you’ll use to manage your hosting account.
3) Enter your billing information make your payment.
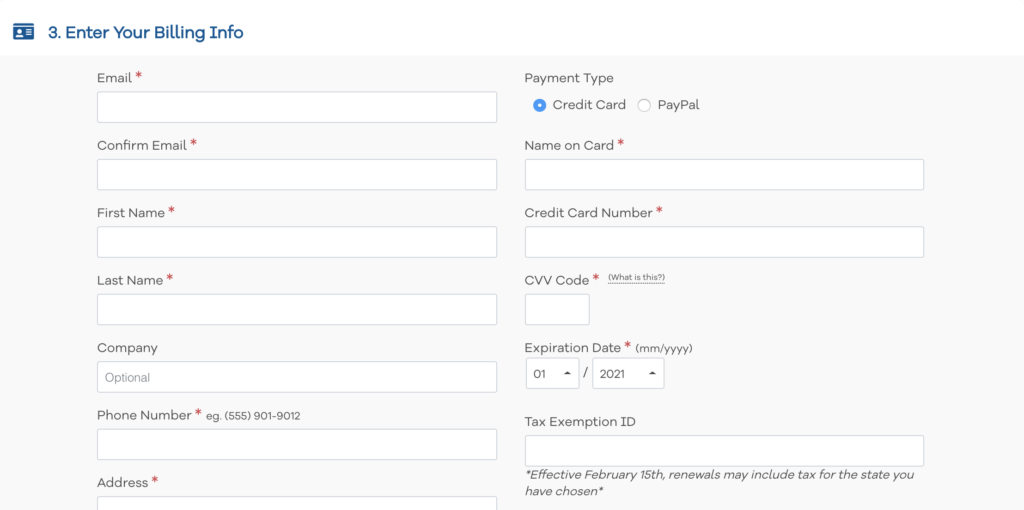
Note: Don’t forget to enter this web hosting coupon code “”. By using this coupon code, You can get an extra 60% off.
4) Finally, click that you agree to the Terms and Conditions, then the big blue Checkout Now! Button.
Congratulations! You have taken the major step to start your blog. But game is still on

Step 4: Install WordPress
1) After that, you will receive mail from HostGator which will contain your C-Panel credentials.
2) Login your account with the credentials you receive through mail.
3) After that, A box will appear like this. Click on Launch cPanel
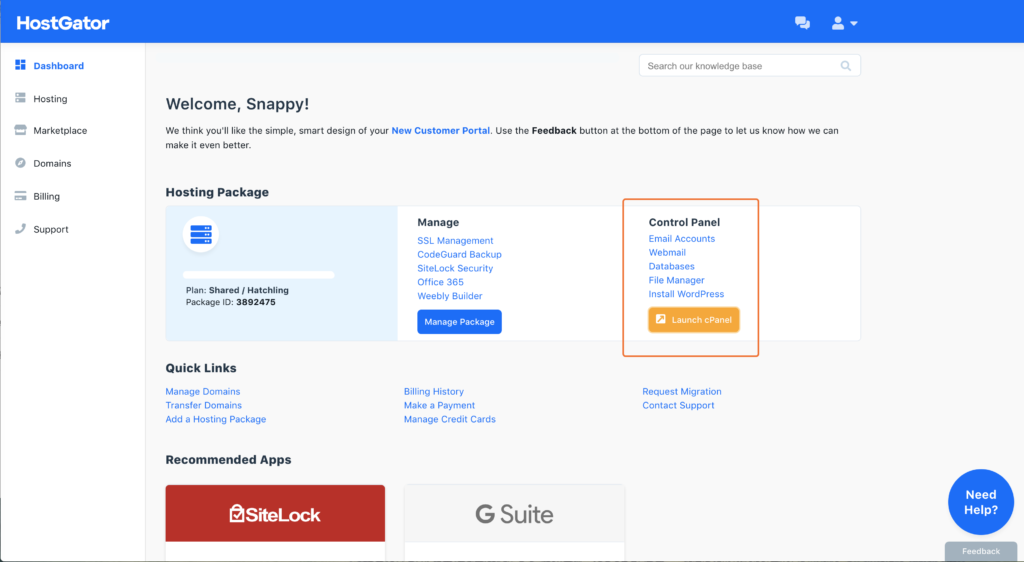
4) Click on WordPress Installer through your cPanel
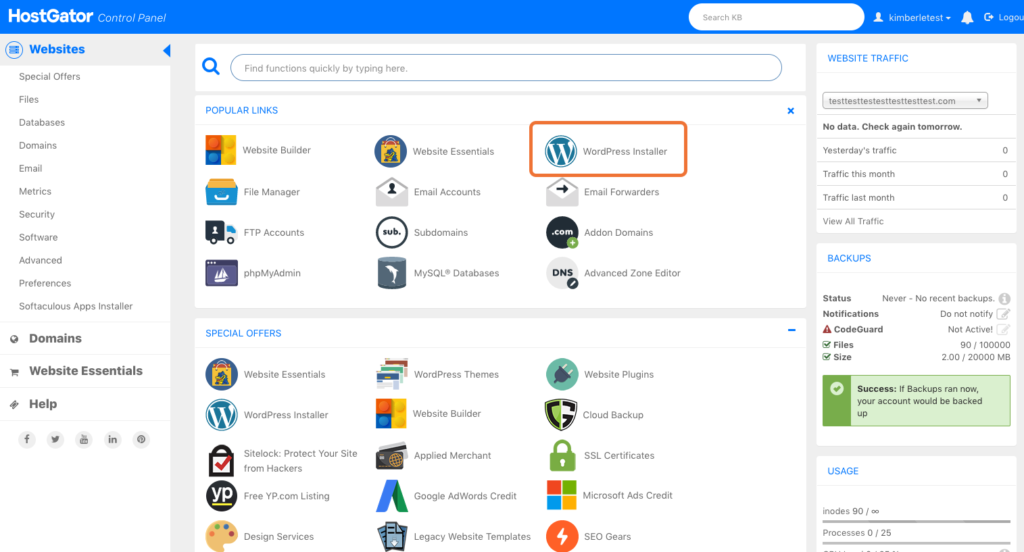
See this video to learn easily and quickly
5) Next, you’ll need to select the domain you want to use for installation and click the NEXT button.
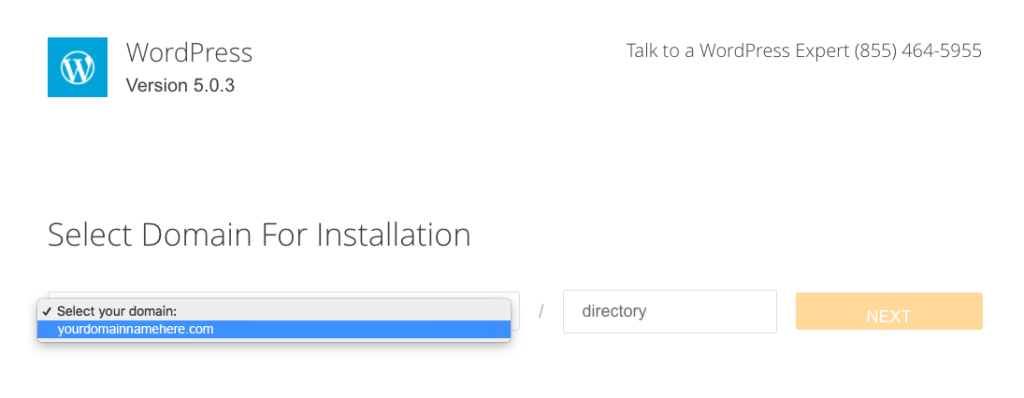
Step 5: Signup WordPress
Now this screen will be opened. Follow these steps to complete installation and click on Install button.
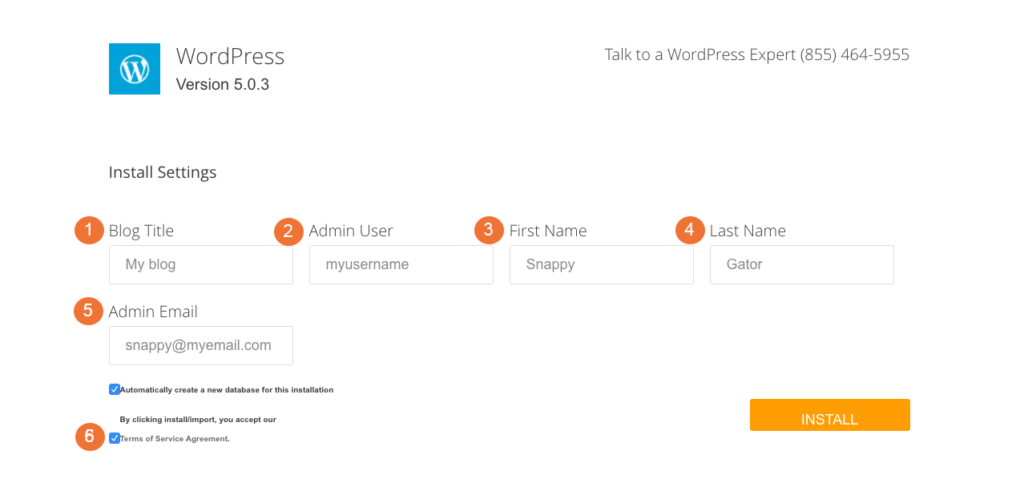
Now you are done to start your blog to increase your online business productivity. This above mentioned steps and images will help you a lot. Especially, for those who are beginner for this. You will also love to learn to drive more traffic to your blog.
In the end, don’t forget to use this web hosting coupon code “” to get an offer of 60%.


